Proudly serving Phoenix, Mesa, Chandler, Scottsdale, Gilbert, Tempe & surrounding areasCall or Text 24/7: +1 (480) 916-7433
Guides

How Is Rubber Flooring Typically Installed on Concrete Subfloors?

Phoenix Rubber Flooring typically installs rubber flooring across the Salt River Valley as loose-lay interlocking tiles, floating mats, glue-down rolls or sheets, or fully adhered commercial surfaces after inspecting and preparing the subfloor. The method matters because the substrate, traffic load, room use, moisture conditions, and flooring format determine how the material should be secured.

Quick Summary

  • Rubber flooring is typically installed in one of four ways: interlocking tiles, glue-down rolls or sheets, floating mats, or a fully adhered commercial system.
  • The subfloor must be clean, moisture-tested, repaired, and flat within 3/16 inch over a 10-foot span before installation.
  • Typical material-and-labor cost is $3 to $15 per square foot, depending on the flooring format, substrate, and project scope.
  • A 500 to 550 square foot residential job usually takes 1 to 2 days, while commercial gym floors typically take 2 to 4 days.

Three Steps That Shape the Installation

Match the Method to the Space

Interlocking tiles usually float in home gyms, rolls and sheets are commonly glued down in commercial rooms, and thick mats can lie loose over a compacted base or plywood deck. Fully adhered commercial systems are selected when the product and traffic load call for continuous bonding.

Prepare and Test the Subfloor

Concrete is cleaned, leveled, repaired, and moisture-tested before adhesive is considered; Phoenix slab-on-grade construction makes ASTM F2170 moisture testing especially relevant. Wood and plywood require a deflection check, secure boards, and ASTM F710-compliant preparation.

Acclimate, Fit, and Secure

The rubber acclimates in the room for 24 to 48 hours before the layout is dry-fit and trimmed. The floor is then interlocked, glued, or taped at the seams, and adhered surfaces are rolled with a 100-pound floor roller to remove trapped air and set the bond.

Rubber Flooring Installation Details

Moisture Testing a Concrete Slab

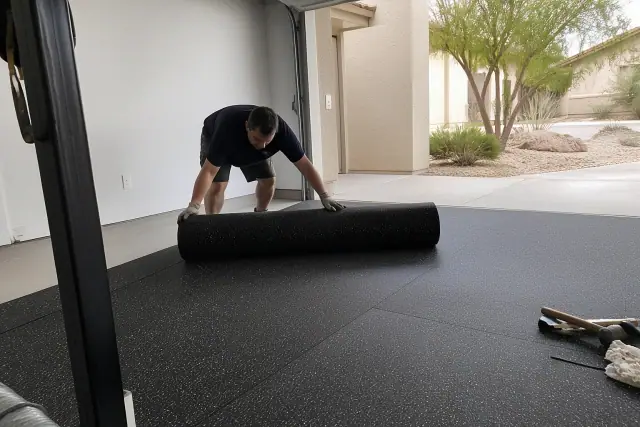
Worker unrolling recycled rubber flooring on a concrete garage floor during moisture testing in Phoenix, AZ.

A clean Phoenix concrete slab being checked with a moisture meter before adhesive is spread. The reading helps determine whether the slab needs a vapor barrier or other moisture control.

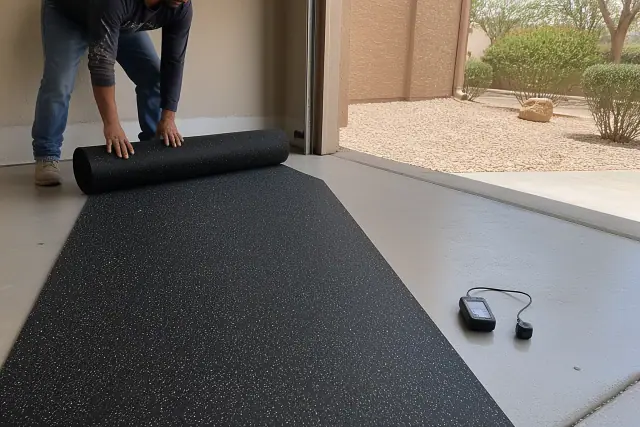
Interlocking Tiles vs. Glue-Down Rolls

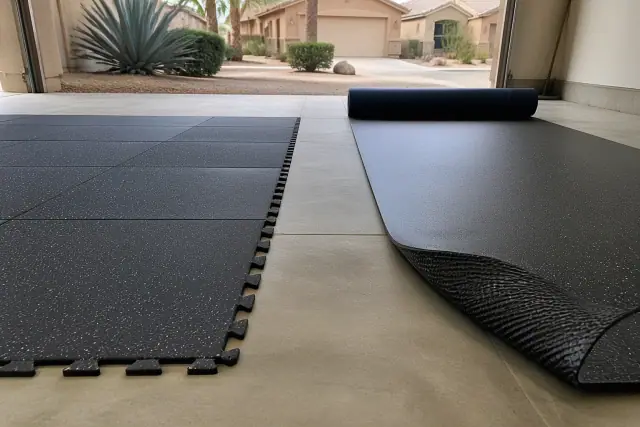
Side-by-side comparison of interlocking rubber tiles and a glue-down roll on a garage floor in Phoenix, AZ.

Interlocking tiles floating over a prepared slab beside a rubber roll set into full-spread adhesive. The comparison makes the difference in seams, bonding, and typical room use easy to see.

Rolling a Fully Adhered Rubber Floor

A worker unrolls recycled rubber flooring over a concrete garage floor at a jobsite in Phoenix, AZ.

A weighted floor roller moving across freshly placed rubber after the seams are aligned. Rolling the entire surface presses out air pockets and establishes even contact with the adhesive.

Installation Planning Snapshot

Subfloor Readiness

Old adhesive should be ground away, cracks filled, loose boards secured, and flatness confirmed before material is fitted. Skipped preparation can allow tile surfaces to telegraph underlying imperfections within months.

Heat and Adhesive Choice

Urethane adhesive is commonly used for high-traffic commercial floors, while pressure-sensitive adhesive can soften above 90 degrees near west-facing windows. In high-heat rooms, the wrong adhesive can allow seams to lift within a year.

Schedule and Cure Time

A single-car garage or home gym may take 4 to 8 hours. A 2,000 square foot commercial floor may require 2 to 3 full days including cure time, so the schedule should account for both placement and restricted use while adhesive sets.

Odor, Sun, and Maintenance

A rubber odor is normal for the first 48 to 72 hours and fades with ventilation. Direct sunlight can fade rubber, dark material can cause migration staining against light vinyl, and routine sweeping with pH-neutral cleaning helps limit wear from Phoenix dust.

Installation Method Comparison

Flooring FormatHow It Is SecuredWhere It Typically FitsPlanning Detail
Interlocking tilesClicked together and floated without adhesive in most roomsHome gyms and spaces where individual tiles may need replacementTile systems average around $10 per square foot installed.
Rubber rollsSet in full-spread urethane or pressure-sensitive adhesiveCommercial gyms and other large, high-traffic roomsRolls are typically 4 feet wide, which reduces the number of seams.
Rubber sheetsFitted and adhered in smaller sectionsGarages and multipurpose rooms with cuts around fixturesInstallation follows the same basic sequence as rolls.
Thick matsLoose-laid over compacted base or plywoodGarage gyms and equine areasMats can be lifted for cleaning and usually need no adhesive.
Fully adhered systemsBonded across the prepared substrateCommercial or specialized continuous-floor applicationsPoured-in-place rubber is closer to $16 per square foot.

Typical project ranges: A standard room may total $800 to $2,300. A 1,200 square foot commercial studio commonly runs $10 to $15 per square foot once adhesive, labor, and trim work are included.

What Installation Usually Involves

Installation starts with the substrate rather than the finish material. A straightedge, utility knife with hooked blades, moisture meter, notched trowel, seam roller, and 100-pound floor roller cover most jobs. After the slab or wood base is cleaned, tested, repaired, and laid out, perimeter pieces are cut and edges are butted tight without overlap. Tiles interlock, rolls and sheets are set into adhesive, and seams may use double-faced tape, seam adhesive, or a heat-welded strip according to the product.

Factors That Change the Method

The subfloor, traffic, room use, heat exposure, and flooring format all affect the installation method. Phoenix's caliche soil and summer monsoon humidity swings can raise concerns about vapor below slab-on-grade concrete, while plywood requires checks for deflection and gaps. Interlocking tiles are easier to replace individually, glue-down rolls reduce seam count across large commercial rooms, and loose mats suit spaces where the floor may need to be lifted for cleaning. Most rubber flooring supplies its own cushioning and sound control, but elevated slab moisture may call for a vapor barrier and uneven wood may need a separate underlayment.

Common Follow-Up Questions

Most rubber flooring does not need separate underlayment because the material already cushions and dampens sound; exceptions include slabs with elevated moisture readings and wood bases with gaps or unevenness. Properly installed rubber flooring can last 20 to 30 years in residential settings, and some commercial-grade rolls carry manufacturer warranties of 10 or more years, although actual life depends on preparation, adhesive choice, sunlight, traffic, and care. Glue-down rolls and sheets are professional-level work because seam alignment, adhesive open time, and roller weight must be managed, while interlocking tiles are the more approachable do-it-yourself format. From preparation through placement, the whole process typically takes one to three days depending on square footage and whether the setting is residential or commercial.
Ask a Local Installer

Need Help Choosing an Installation Method?

Share the room use, approximate square footage, flooring format, and whether the subfloor is concrete or wood. A local installer can help compare moisture control, adhesive, seam, underlayment, and scheduling requirements before work begins.